Only two more sleeps until Santa makes his way from the North Pole to spread a little cheer :)
Step Seven:


I don't know about your families, but my kids are so excited that every time they hear a siren outside they shout, "It's Santa!" LOL. Getting a tad ahead of themselves, I think.
So here at Upsy Daisy we hope that everyone of our lovely supporters has a wonderful Christmas and a safe and very happy New Year!
In order to celebrate the occasion, I have put together a little tutorial for you to have a play with in case you get some time to scrap over the holidays.
Here it is:
How to make a Flower Garden using Upsy Daisy Papers and your Punches:
Step One:
Cut a 1.5inch x 10inch strip of paper. Use your scissors to cut small snips into the piece of paper NOT all the way to the bottom.
Step Two:
Once you have snipped all the way along the paper, come back to the start and start snipping at odd angles in order to chop the little bits of paper into odd/uneven shapes.
Step Three:
At the end of this process, your "grass" should look like this:
Step Four:
Using a large circle punch (I have used the Whale of a Punch 2 inch), punch out two large circles from your other UD paper.
Using a large circle punch (I have used the Whale of a Punch 2 inch), punch out two large circles from your other UD paper.
Now punch out some smaller circles, as well as some scalloped shapes using a Marvy scallop oval
punch. You'll need a few from two or three different colours.
Step Five:
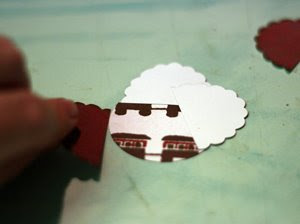
Gently ink the outsides of the scalloped ovals and then cut them in half with a pair of scissors.
Gently ink the outsides of the scalloped ovals and then cut them in half with a pair of scissors.
Step Six:
Now put your large circles facing down on your desk and cover the back with some tape or glue. Using the scalloped ovals that have been cut in half, place them in even spaces around the outside of the circle with the right sides also facing down.
Step Seven:
Your finished flower should look like this:

Now all you have to do is bend the petals of the flowers in a bit and raise the flower off the surface of your page in order to give it depth and dimension.
Here is my example of the finished product:


Here is another way to use your punches to great effect - this time I used the Whale of a Punch Butterfly on my Upsy Daisy papers so that I could show off both sides of the papers!
So that's it from me and the rest of the Upsy Daisy crew until after Christmas - have a wonderful day and many blessings to you and your families!
Sares xx


2 comments:
OMG I am so in love with these flowers!!!! What an awesome tutorial!
Totally GORGEOUS! LOVE all the detail instructions you gave with these too! LOVE it all! xoxo
Loves,
K
Post a Comment