Monday, January 31, 2011

FUSSY CUTTING WITH HOME SWEET HOME

Most of the times, the first things I look at the papers are the patterns that I can cut. I love it when I can cut a lot of shapes and layer them on top of each other to achieve beautiful clusters that would accentuate my photos.

It's love at first sight when I got hold of Home Sweet Home, I had a blast cutting the flowers and the birds found in Alma paper. I'm sharing with you two layouts today - - both having a lot of fussy cutting!!!

Here's my first layout: The big flower cut-outs are perfect for scrapping my 5x7 photo (it's my current fave size to scrap!!!!):

Supplies: Home Sweet Home papers (Alma, Maddison St., Midland Ave, Rockland Rd), Walk in the Park Fabric Brads.

The Walk in the Park fabric brads work perfectly as flower centers:


Random cut-outs adhered with pop dots for added dimension (itty bitty houses from Midland Ave. over Maddison St.'s!!):

Cute birdie sighting in Alma paper (pop dots really do the trick, don't you think?):


Here's my second layout: I love this saying from A. Danielson found in Maddison St. paper, but I couldn't think of a title that would go well with it (so forgive me for the very original "Remember" title!!!! LOL!!!!!!!!!!!!). I cut the quote strip in three sections and incorporated it in the design of my layout:

Supplies: Home Sweet Home papers (Alma, Beach, Cedar Cres, Maddison St., Midland Ave, Rockland Rd), Walk in the Park Fabric Brads.

More cut-outs in this layout!!!


I hope I inspired you to take out your stash of Home Sweet Home papers and cut, cut, cut!!!! Have fun creating!!!

Until next time,

janis

Monday, January 24, 2011

January's Product Showcase

hHi all. As most of you know by now, we are changing things up a bit here at the Daisy Diaries blog for the year 2011. The fourth Monday post will be allotted for technique or product showcase.

I'm very honored to be the first one in this year to share my showcase and I chose product.

Over the last two CHA's, Upsy Daisy Designs have features specific papers in their new lines with journaling blocks and quote strips. This is one of my favorites in each line and I decided to share with you what I did with the Avalanche's Summit paper.


There is only one you

In my page, I decided to put my focus on one photo. I think the picture of my dad and daughter is so precious that it deserved a full page just for it. Anyways, I used the wipeout paper as my background because I love the neutral color but the distressed design gave it some pop.
I then layered some of my favorite strips from the line. I loved the "there is only one you" quote that I decided to make that my title.


with the smaller blocks like this clock above, I added it as an embellishment, filling the middle with a flower and a UDD brad.


I used my daughter's shirt color as a visual triangle element and matched it with my two flowers on the page. I added another UDD brad in my layered flower above.

As you can see, there are so many possibilities with the Summit paper. You can use most of it in one page, like what I did here or just spread them around to a few pages or even a mini. For an example of this, check my blog. I posted a mini using the same paper lines.

Thanks for stopping by.

Till next time,
Grace

Monday, January 10, 2011

Fun Bubbles!!

When crafters see the “Avalanche” papers from Upsy Daisy Designs, they immediately think “snow”, right?
Well I thought “BUBBLES!”

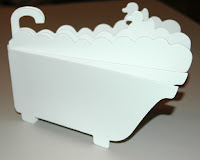
I found a really cute bathtub board book at the craft store to use, but you can use bubbles on layouts or cards or any other project.


I wanted to think of different ways to make bubbles for my “Fun Bubbles” mini book.

(1) I punched holes in parts of the blue shades of the Avalanche papers and some from cardstock.


(2) Then I wanted to “decorate” the bubbles different ways. I used gems, stickles glitter and paint, and the Upsy Daisy Clear Stamps “Make a Bloom.”

 
(3) After decorating my “bubbles”, I used a clear-drying glue on top of each one…. (you can use the Glossy Accents or Gloo, or any other clear-drying liquid glue). Cover each bubble you designed with the clear-drying glue and let dry completely.


(4) Attach them to your project with whatever adhesive you choose.


(5) I also used a few of the round Upsy Daisy Designs brads for some of the bubbles!


(6) For the large bubble on the cover, I actually used a clear nail polish I found with sparkles and tiny hearts that were already mixed in the clear polish.


There are so many ways to make your own bubbles!  Have fun using papers from all of the Upsy Daisy Designs patterns to make your own bubbles!!


Monday, January 3, 2011

A Year in Review

Happy New Year to all of you!

I hope you all had a wonderful, relaxing and blissful start to 2011 - may it be full of joy and prosperous for you and your loved ones.

This year we are changing things around a bit on the Daisy Diaries and have come up with different themes for our weekly musings, which we hope you will enjoy:

  • On the 1st Monday of the month, we will show you a project - which can be anything but a layout.
  • On the 2nd Monday of the month, we will share a step by step tutorial with you
  • On the 3rd Monday of the month, we will set you a challenge
  • On the 4th Monday of the month, we will showcase a specific technique or shine the spotlight on one of our wonderful products

So, what do you say - shall we get this party started?

For my first post this year, I am excited to share an envelope mini-book with you, which used many different Upsy Daisy Designs products.
Mini books are prefect to use up all those scraps that you may have saved from you favourite papers.

Throughout 2010 I have kept a list of all the good and bad things that I encountered each month, and I blogged regular about it. That meant, at the end of the year I could print out all the lists I posted and finish my yearly review in a flash. I am not going to bore you with every single month, but show you a few pages of the mini book. Hopefully this may inspire you to create you own mini book with a review of the passed year.

** click on any of the images to enlarge their view **

UDD Products used:
Papers: #AVA012. Extreme, #AVA015. Summit, #AVA014. Powder, #SYLA015. Gators
Stamps: #UDD208. Chic Bebe
Brads: #BRD312. See You Later Alligator