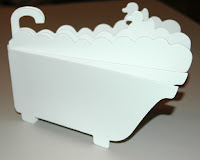
Well I thought “BUBBLES!”
I found a really cute bathtub board book at the craft store to use, but you can use bubbles on layouts or cards or any other project.
I wanted to think of different ways to make bubbles for my “Fun Bubbles” mini book.
(1) I punched holes in parts of the blue shades of the Avalanche papers and some from cardstock.
(2) Then I wanted to “decorate” the bubbles different ways. I used gems, stickles glitter and paint, and the Upsy Daisy Clear Stamps “Make a Bloom.”
(3) After decorating my “bubbles”, I used a clear-drying glue on top of each one…. (you can use the Glossy Accents or Gloo, or any other clear-drying liquid glue). Cover each bubble you designed with the clear-drying glue and let dry completely.
(4) Attach them to your project with whatever adhesive you choose.
(5) I also used a few of the round Upsy Daisy Designs brads for some of the bubbles!
(6) For the large bubble on the cover, I actually used a clear nail polish I found with sparkles and tiny hearts that were already mixed in the clear polish.
There are so many ways to make your own bubbles! Have fun using papers from all of the Upsy Daisy Designs patterns to make your own bubbles!!


5 comments:
Oh wow - this is awesome Sandi!
I so want one of those mini-books now.
That has to be one of my favourite projects from you!
Isn't this cute?
LOve this! Great use of this line - it is so versatile!
so pretty...
what a cute project... Need to make me something like that :)
What an adorable mini!
Post a Comment