Monday, May 30, 2011

Cupcake thanks!

Hey everyone, it is Jacquelin here and today I have a quick and easy little project tha tyou can use to say thanks to a favourite teacher or happy birthday to a special friend.

This little paper cupcake is fun and fast and a great gift! I used the fabulous "See You Later Alligator" line - it is perfect for teachers!


Here are the basic instructions:
 
1. Using a craft knife, trim  a piece of florist’s foam to a 2 1⁄2×1 7⁄8" cylinder. Cut a 6 3⁄4" circle from first patterned paper and fold it in half. Fold the circle in half four times, then unfold it until it is a circle again. There should be 16 creases in the paper.

2. Create an accordion fold around the circle by folding from one crease to another. Open the paper and place the center on the foam cylinder. Press and shape the paper over it. Turn the cylinder right side up and hot-glue the paper pleats evenly around it.

3. Cut ten to twelve 3⁄8×12" strips of a second patterned paper and wrap them around a pencil to create spiral loops. Insert a straight pin in one side of each loop and stick it into the exposed foam. Don’t worry if some of the foam shows around the edge.

4.  Add a chipboard phrase to the front. Hot-glue a lollipop sticks to the backs of punched phrase. Trim the stick to the desired length and stick them into the foam.  Add a gift card of your choice!

And just because I love this line - a quick little layout all about our family's love affair with Rockband!!


I hope you enjoy these quick and easy projects - and "See you Later, Alligator!!

Jacquelin

Monday, May 23, 2011

For the love of plaid !

Hi there, Marielle here today with a fun technique for you. I love, love ,love plaid paper and I thought it would be fun to make my own plaid design using the different stripes found on the papers of the Cupcake collection.


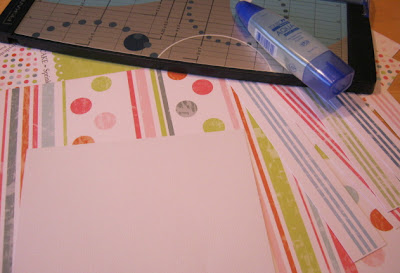
 You will need striped papers (of course), white cardstock ( I used a 6x6 piece) ,a paper trimmer and glue.

 Cut various widths of different colored strips of papers.


Glue them on your piece of cardstock weaving them as shown.

 until you are happy with the look of you plaid pattern paper !!


Then use it to make a fun little layout about a sweet little cupcake. (this little cutie is my niece !!)

This month theme was to use a song for inpiration...mine was Celebrate (from Madonna.)

 I made little banners using the rub on cupcakes.
Hope you'll give this technique a try on your next Upsy Daisy project.
Bye for now :)
Marielle

Monday, May 16, 2011

Mixin' & Matchin'

Hello Upsy Daisy fans.  Today is challenge day on the Daisy Diaries blog and I challenge you to mix and match your favourite product lines to create a project.

The first example I have to share uses paper from three totally unrelated lines: " Man About Town II", "Cupcake" and "Unwritten".


The second page mixes "Man About Town" with "A Walk in the Park" and "See You Later Alligator", a more predictable combination than the previous page.


Thanks so much for visiting and don't forget to link us up in the comment section if you participate in this month's challenge.  Have a wonderful day!

Monday, May 9, 2011

Step-by-Step Card Tutorial

Hi Girls!!! Julia speaking! I am so happy to be responsible for May's Tutorial.  As lately I have been so into Card making, I come to share a Step-by-Step Card Tutorial with you showcasing Upsy Daisy's "Home Sweet Home" Collection.

Step 1:
Choose the paper collection you will be using to highlight your work. On this card, I chose to use the Upsy Daisy  'Home Sweet Home' Collection.


Step 2:
Choose a neutral cardstock as your base - I generally use white, black, cream or light blue, but its your choice, so feel free. Score the card and fold it in half. If you don´t have a bone scorer, or a folding plate, try using a rub-on tool.


Step 3:
Sort through your papers and coordinating embellies, besides any other materials and techniques you may ellect to work. I did a lot of cutting, before choosing the elements I would be using. And, at this time I chose to use a frame, a clear round acrylic frame, from a brazilian trend called Arte 1.


Step 4:
Choose a patterned paper with small patterns on it and cut it into +1cm stripes as you can see on the photo. If your frame is not an adhesive one you may, first, add double tape to the back of the frame.


Step 5:
Attach the paper stripes to the frame, as shown, as tight as possible and living no blank spaces.


Step 6:
Create your card with a special touch of yours, but using a Sketch, in case you need saving time! Then, mix your chosen stash and check if they work well together. Add, replace and remove items until you feel happy with their position, until you feel they are right where they should be! Then, just stick them down and voilá!


Monday, May 2, 2011

Happy Day

Happy Monday and welcome to May.

Here in the UK we have a bank holiday today, which means that office people have a day off work...woooohooo!
What better way to celebrate than with getting stuck into paper and glue and create up a storm.

Today, I have a card/tag combo for you, which I hope you will enjoy.

For the card, I made use of papers from two very different collections: VOGUE and AVALANCHE


For the tag, I used some left-over scraps from the AVALANCHE  line to create the rosette and added a cut up RUB ON as a further point of interest to the overall design