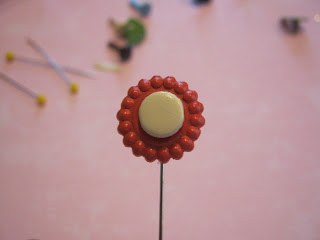
Hello everyone, Marielle here today to share a quick and easy step by step tutorial on how to make your very own decorative stick pins using some of your favorite Upsy Daisy supplies !
Start by assembling your supplies ,you will need:
Quilting pins
Hot glue gun
Wire cutters
Various UDD decorative brads
Small images on your favorite UDD papers and Rub ons.
Step 1- Add a dab of hot glue to back of decorative brad, add pin and fold the attachment part of the brad as shown.
Step 2-Using wire cutters, cut off the attachment portion of a plain brad .
Step 3- Glue to the middle of your flower. You can also add some of your favorite gems.
You can also fussy cut small images like these cute little cupcakes. You'll just need to glue them on to one of your pins (to note that I took off the little "ball" part of the pins for these ones.)
A close up of some flower pins from a card I had made a while back.
The "dream" image is a rub on.
Here are those little cupcakes. I could go on and on with ideas for these pins. I hope you'll give them a try on your next project.They are a super easy way to add a little something special to your layout or card. :)
Our House
I also created this layout for this month's challenge of creating a project with a quote in the title or journaling. Mine was easy because I just cut out a small card from the Home Sweet Home collection that says " Home is where the heart is" So true!!!
For fun , I cut out a few of the small houses and made pins for my layout!!
Thanks so much for dropping by the Upsy Daisy blog today !!
Have a great week and happy crafting !!


4 comments:
What an AMAZING idea!!!! I am totally in love with this
this is so smart! thanks for sharing
I love your awesome pins and the fabulous projects you made with them!
Hi Marielle!
Great idea! Love your creative pins!
xox Julia Sáddi - Brazil
Post a Comment